 Procedure for Registering expenses
 Outline
Conduct new registration, modification, and
deletion of expenses.
1.Screen
display method
-
Select [Debts] → [Expenses management] → [Register].
-
From the Menu, select [Register Expenses].
→ the [Register expenses] screen will appear.
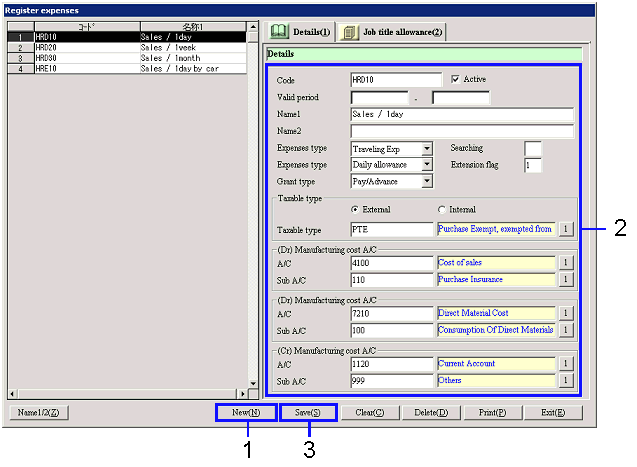
2.To
register new expenses
→ To Menu Reference
-
Click the "New (N)" button.
→ The items displayed on the right will be cleared.
-
Enter the necessary information in the items displayed on the right.
-
Check the contents entered, and then click "Save (S)" button.
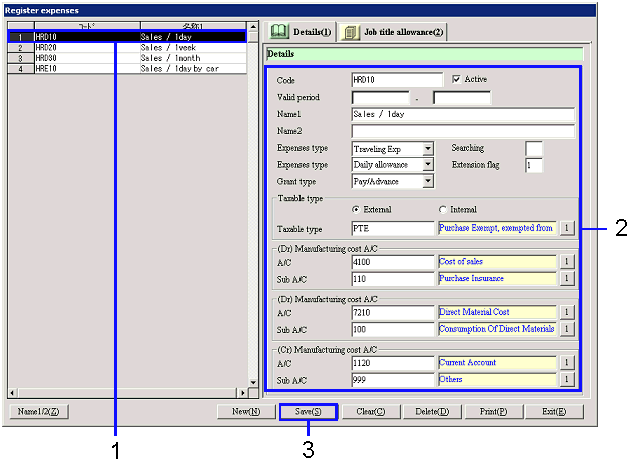
3.
To change the registered expenses
-
From the [Spread], select the row with the information to be
changed.
→ The information selected will display in the items on the right.
-
Make changes to the information.
-
Check the content of the changes, and then click "Save (S)" button.
4.
To Delete registered expenses

-
From the [Spread], select the row with the information to be
deleted.
→ The selected information will appear in the items on the right.
-
Click on the "Delete (D)" button.
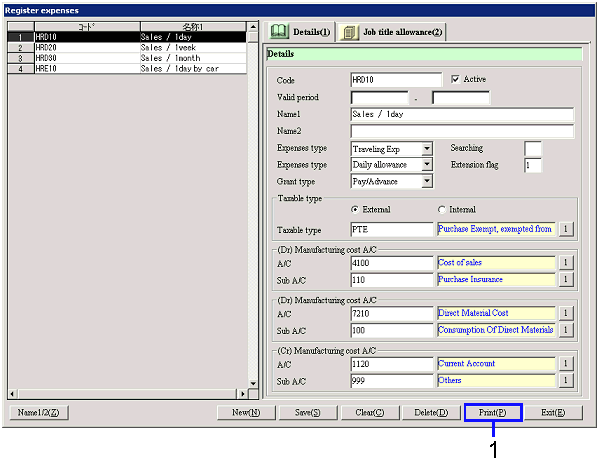
5.
To Print the information being displayed
-
Click the "Print (P)" button.
→ The [Print expenses] dialogue will appear.
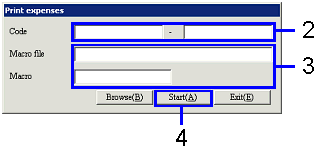
-
Enter the print range in "Code."
Here, enter the "Code" on the [Spread].
-
In order to apply Microsoft Excel
Macro when printing, enter the "Macro file" and "Macro."
You may also click the "Browse (B)" button to specify the Macro file.
-
Click the "Start (A)" button.
6. Job
title allowance setup
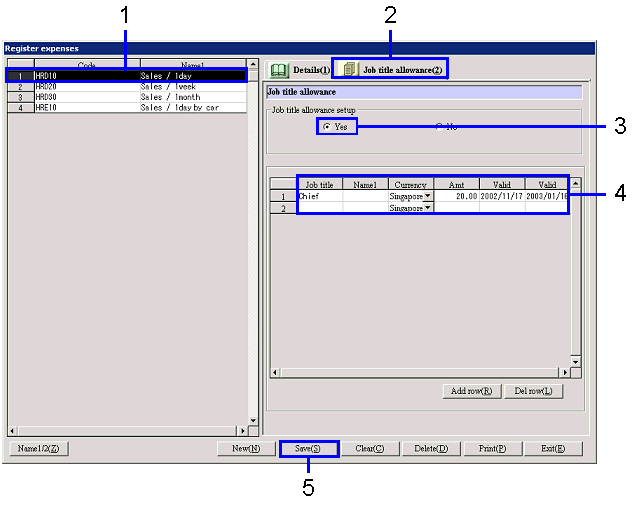
-
From the [Spread], select the row with
the information to be setup.
→ The selected information will appear in the items on the right.
-
Click the [Job title allowance] tab.
-
With the "Job title allowance setup"
option button, select "Yes."
Depending on the data, the setup of job title allowance may not be possible.
-
Setup the job title allowance.
-
Click the "Save (S)" button.