 Procedure for notes receivable entry
 Function Outline
In [notes receivable entry], register the setup for auto-journal and the notes receivable information to manage. It also allows the modification of updated notes data status. However, it does not allow the update of the status itself. After the registration confirm the auto-journal in the [Transfer voucher] screen.
 1. Screen Display Method
- Select [Claims] → [Notes Receivable] → [Entry].
- From the menu, select [Notes Receivable
Entry].
→ the [Notes receivable entry] screen will appear.
 2. Entry of the [Header]

→To Menu Reference
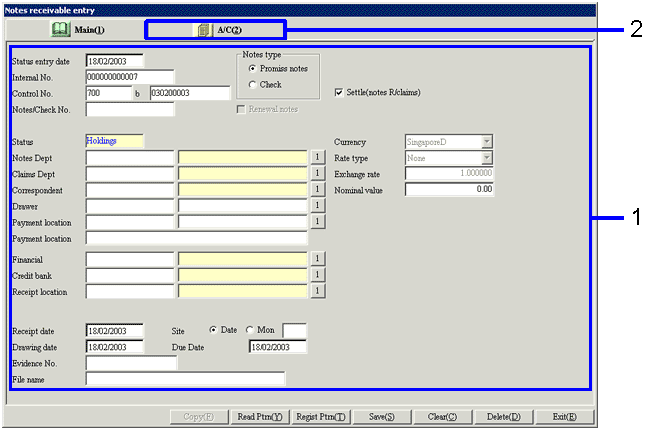
- Select the "Notes type". Select from "Promiss Notes" and "check".
Enter the notes information.
→ The "Drawer," "Payment location," "Site," and "Due date" will be automatically entered based on the information set up in [Register correspondent] in [Common master]. However, it is also possible to change the content.
→ "Currency " and "Rate Type" willl be Std currency set up in [Company setup] in [System custodian]. Changes are not permitted.
- Click on the [A/C] tab.
 3. Entry of [A/C]

→To Menu Reference
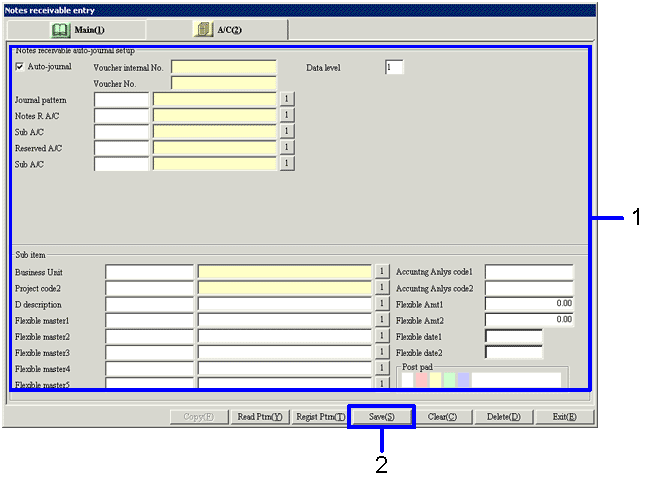
- Enter the [Notes receivable auto-journal setup] and the [Sub item] in the [A/C] tab.
When the "journal pattern" is entered, combinations of "Notes A/C," "Payment interest A/C," and "Claims A/C" registered in [Register auto-journal pattern] will be filled automatically.
- Click on "Save (S)" button.
→ The [Transfer voucher] screen will appear.
 4. Transfer Voucher Confirmation

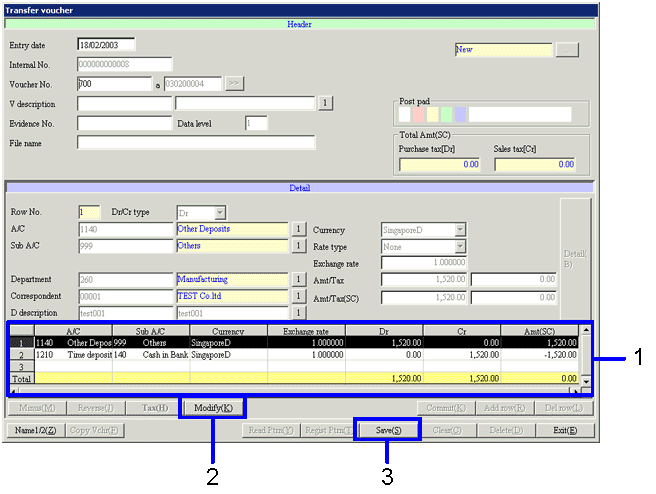
- Confirm the spread in the [Details] of the
[Transfer voucher] screen.
- When you click on the "Modify
(K)" button, you can modify the items on the [Transfer voucher] screen.
- Click on the "Save (S)" button.
→ The notes receivable information entered will be auto-journaled.
![]() Procedure for notes receivable entry
Procedure for notes receivable entry![]() Function Outline
Function Outline![]() 1. Screen Display Method
1. Screen Display Method ![]() 2. Entry of the [Header]
2. Entry of the [Header]
![]() 3. Entry of [A/C]
3. Entry of [A/C] 
![]() 4. Transfer Voucher Confirmation
4. Transfer Voucher Confirmation